A new recipe for a spring BBQ

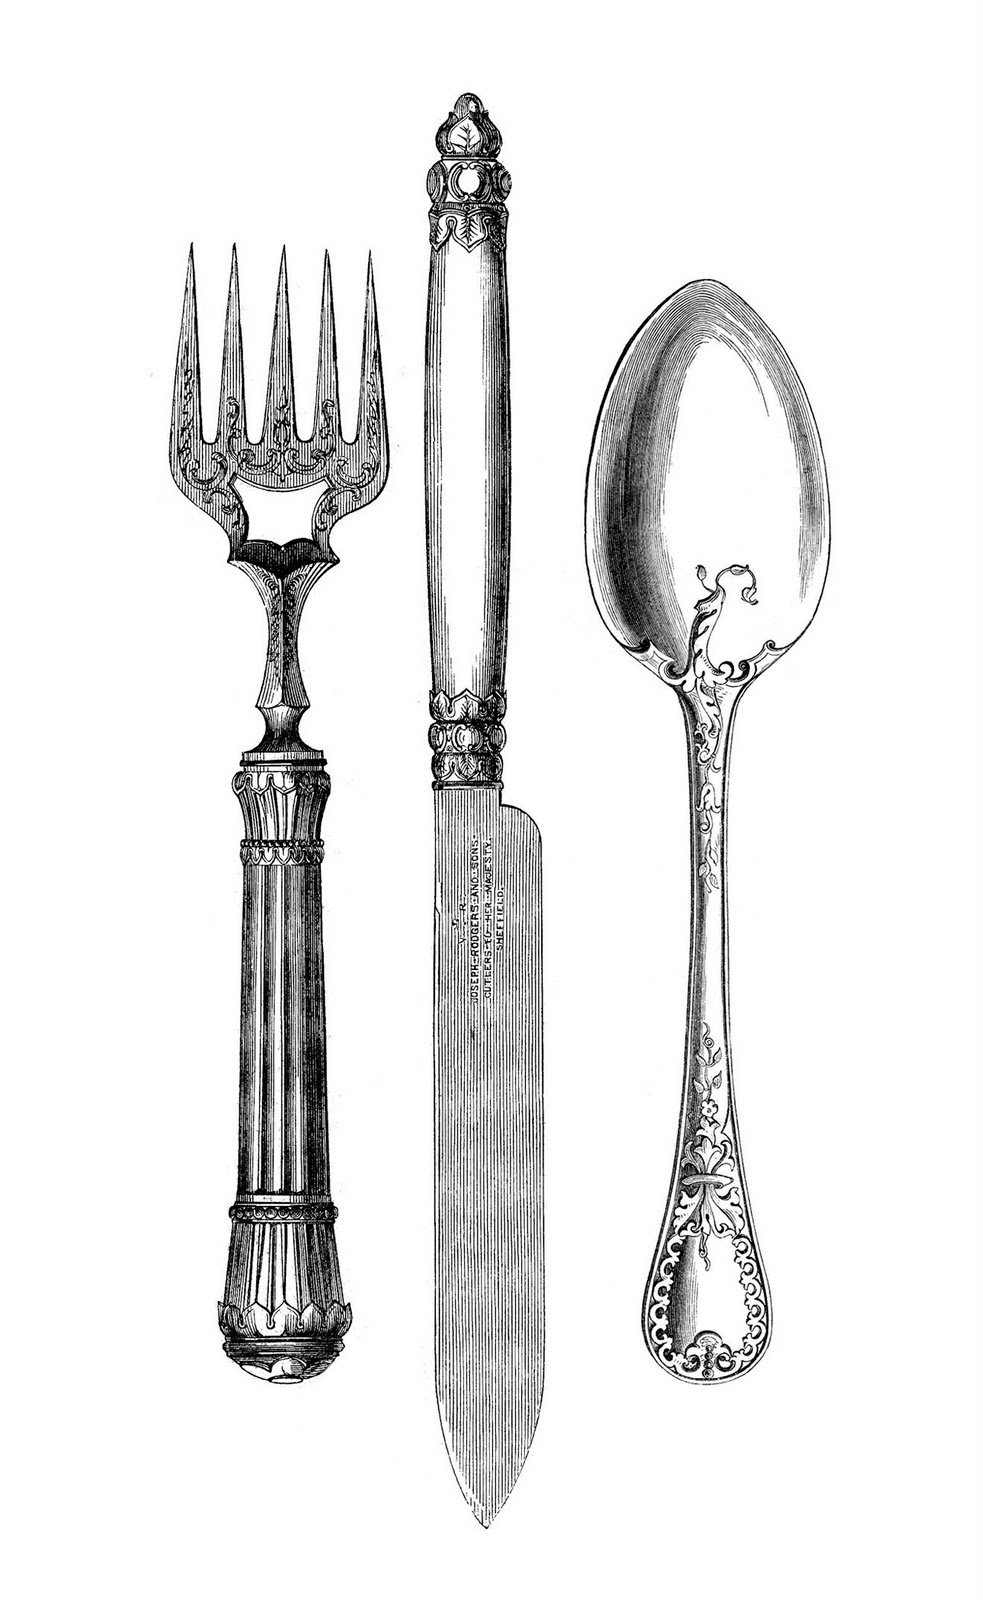
Image via Graphics Fairy

I’m eager for spring to show its sunny self and present us with an opportunity to dine al fresco and enjoy a yummy burger.  We’ve had a few days that have hinted at it’s permanent arrival…only to be followed by overcast, gray skies!  (I know, stop whining.  It could be worse!)

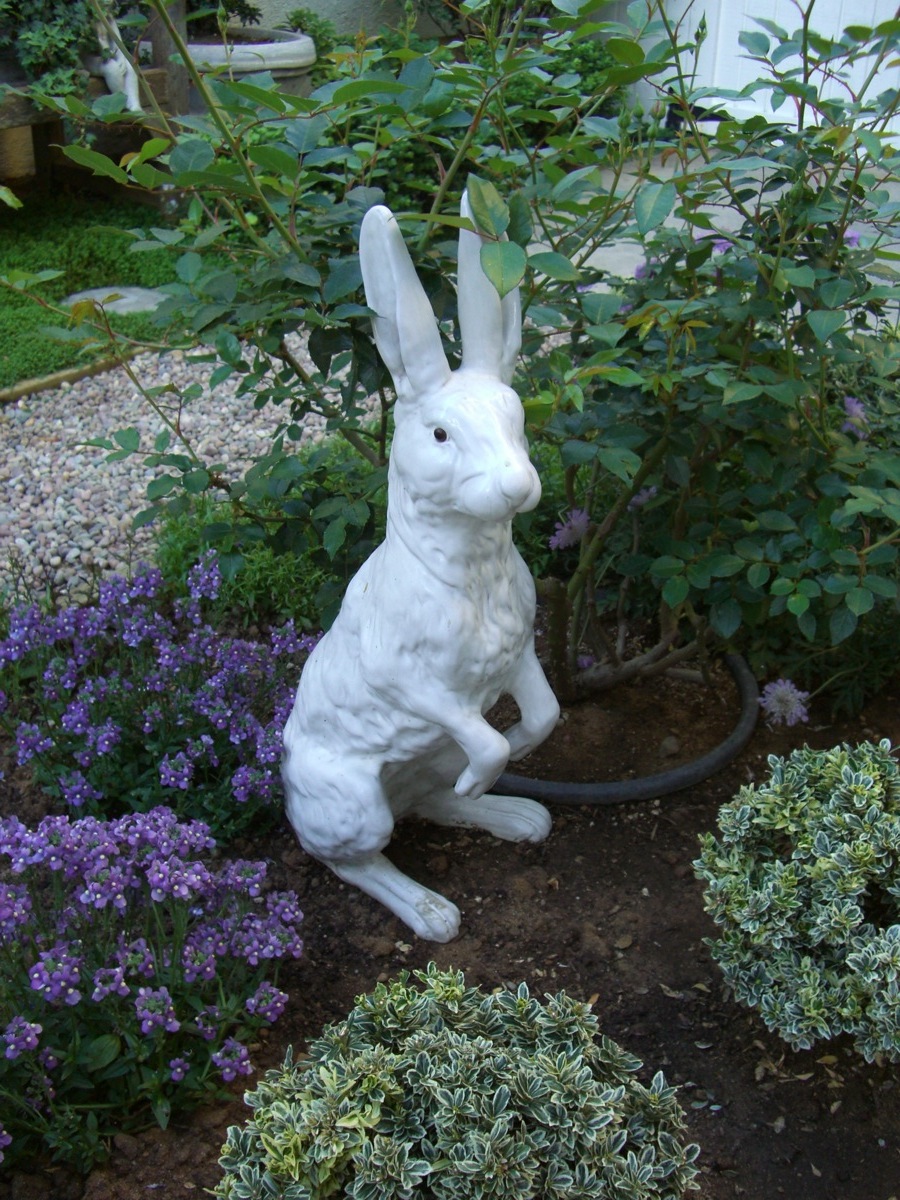
Image via French Essence

I’m normally a beef burger kind of gal but this recipe enticed me with the seasonings used and I thought maybe I could eat one healthy burger every now and then, I mean what’s the harm, right?

I mentioned Epicurious a couple of weeks ago and this “Best of Epicurious” recipe site (within their site) is chock full of deliciousness.  If you like tasty recipes that are tested by lots of readers who send in glowing reviews I urge you to link HERE.  If you’d like to print a clean copy of this recipe, click HERE.

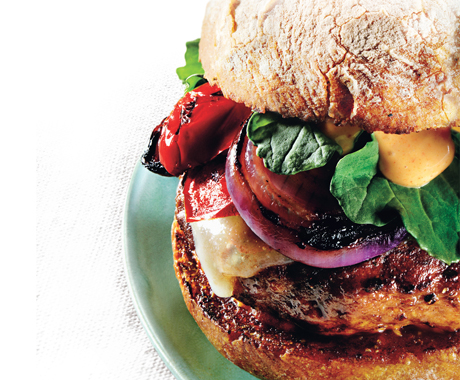
Grilled Turkey Burgers with Cheddar & Smoky Aioli

———————————————————————————————

INGREDIENTS:

  • 1/2 teaspoon cumin seeds
  • 1/2 teaspoon coriander seeds
  • 1/2 cup mayonnaise
  • 2 tablespoons extra-virgin olive oil plus additional for brushing
  • 2 teaspoons fresh lemon juice
  • 1 1/2 teaspoons smoked paprika
  • 1 garlic clove, pressed
  • 1 pound ground dark-meat turkey
  • 4 1/3 -inch-thick red onion slices
  • 1 large or 2 small red bell peppers, quartered
  • 4 slices white cheddar cheese or Monterey Jack cheese
  • 4 sesame-seed hamburger buns
  • Arugula
  • Pickle wedges
  • Corn chips

INSTRUCTIONS:

Toast cumin seeds and coriander seeds in small skillet over medium-high heat until aromatic and slightly darker in color, shaking skillet often, about 1 1/2 minutes. Cool. Finely grind toasted seeds in spice grinder or in mortar with pestle. Whisk mayonnaise, 2 tablespoons extra-virgin olive oil, fresh lemon juice, smoked paprika, garlic, and ground spices in small bowl. Season aioli to taste with salt and pepper. DO AHEAD: Aioli can be made 1 day ahead. Cover and refrigerate.

Place turkey in medium bowl. Add 2 tablespoons aioli; mix gently. Using damp hands, divide turkey mixture into 4 equal portions, then form each into scant 3/4-inch thick patty, about 3 1/2 inches in diameter. Using thumb, make small indentation in center of each burger. DO AHEAD: Can be made 4 hours ahead. Cover and chill.

Prepare barbecue (medium-high heat). Sprinkle burgers with salt and pepper. Brush onion slices and bell pepper pieces with oil; sprinkle with salt and pepper. Grill onions and bell peppers until soft and charred, about 4 minutes per side.

Grill turkey burgers 5 minutes. Turn over; grill until almost cooked through, about 4 minutes. Top each burger with 1 cheese slice and grill until meat is cooked through and cheese melts, about 1 minute longer. Place 1 turkey burger on each of 4 bun bottoms. Arrange grilled red pepper pieces, then grilled red onion slices over. Top each with dollop of aioli and some arugula. Cover burgers with bun tops and serve with pickle wedges and corn chips.

Have you barbecued your first burger of the season yet?  If so, what’s your favorite?


A baby break…grandbaby is visiting

Tags

I will be taking a little break from .     Our granddaughter (5 months old, April 28) is visiting!

As many of you may know, Son #1 and his lovely wife live in Austin, Texas.

They have been amazing making sure Grandma and Grandpa see pictures weekly and we Skype weekly but (you knew this was coming) all of that can’t compare with holding a sweet little girl and getting to snuggle with her…

feed her…

read to her…

take her on walks…

…you get the picture.

I will return to my 3 posts a week schedule beginning April 22th.  I’ll miss you and treasure our “blog land friendship”!

Easter and other thoughts of spring

Tags

Spring fever has temporarily stymied the creative juices in me but I did come across some very pretty centerpiece ideas over at Martha’s (Martha Stewart dot com).


Image (above) via Small Stump + Studio

Image (above) via Martha Stewart

Images (above and below) via Martha Stewart

The wonderful thing about this time of year is that you can find flowers for a song (well, maybe not a song but truly affordable) and with the help of some warm weather and a sunny day, you can set a festive table and serve almost any meal and you, family and/or guests will be happy.

It’s pretty universal; the advent of spring gives everyone’s spirits a boost.  I try to capitalize on that feeling and the energy rush it provides, and clean, plan, and entertain.

Where decorating is concerned there are some rooms that seem like the very definition of spring…like these rooms recently featured in House Beautiful.  Designed by Doug Davis of Tracery Interiors, this Alabama home speaks “spring”…in part because of the pink accents.  I am not usually a huge fan of pink in décor for the home, but the subtle splashes in this instance have me hooked.

Images below via House Beautiful

I think this is home feels light and airy (very spring-like), in spite of the hints of formal living.  It’s got to be the pink touches. To read more about this house, including the interview Mimi Read conducted with Paige Schnell and Doug Davis click HERE

What are your thoughts this spring?  Have you come down with a case of Spring Fever?


Renovation of the library

Tags

I’ve talked about renovating our library a few times, but I finally started this project.  Does that ever happen to you?  You think you want to re-do a room and for a variety of reasons you just don’t  get around to that first step (in this case, removing wallpaper).

Before renovation (above), after wallpaper removal (can you believe the room was pink?…more on that later).

The room used to be our dining room (read about the switch HERE) but now serves as a smallish “sitting” room which I affectionately call the “library” since the wonderful southern exposure makes it a great room to read in (and yes, the walls, under the wallpaper, were pink)   As with so many benefits (plenty of sunlight) there is a down side…everything fades within a very short time due to non-stop sun exposure.  I will have to either upholster with Sunbrella fabrics next time or have the windows tinted, or both.

~BEFORE~

Can you see the faded sofa fabric…if not, that’s a good thing because it will be awhile before I reupholster.

~BEFORE~

The thing is, I figured since upholstery is still a ways off I should go ahead and paint the room.  Painting became more of an urgency when I decided to move the large, framed print (in picture above)  to another location in the house.  To my dismay the wallpaper was so badly faded from the sun it looked dreadful.

Stripping the wallpaper wasn’t too difficult.  I have used, with success, the liquid remover that you mix with warm water and spray on the walls, then begin to strip the paper using a light hand with a scraper.  The labor-intensive part was using TSP and warm water to dissolve and remove the wallpaper paste.  If you do not remove every bit of paste your paint will crackle and ruin your new paint job (I speak from experience).

Ta-da…here is the paint color, finished and ready for furniture.  What’s missing?  The ladder-back chair that sits to the right of the gate-leg table is being repaired.  The sun had really beat up the finish and my furniture re-finisher said her could fix it for so few dollars that we decided to let him work his magic.

Finding a paint color wasn’t easy, as I mention HERE.  But after an exhaustive search I ended up with a fairly safe, and very pleasing choice—the same color I have in our dining room, which I really like.  Dunn Edwards “Inside Passage”.  This color can take on a variety of hues depending on the time of day and the amount of light.  It has a grayish look and that is what I was searching for.

I kept most of the accessories and wall art in the same place (I did replace the botanic art (which was badly faded) for an etching Son #1 and his lovely wife brought me from Paris, which makes me smile every time I walk into the room.  I did add a basket of childrens books under the end table for upcoming visits from our granddaughter.

Oh, and about the pink walls…many years ago I was a total English Country/Mario Buatta gal and cabbage rose-filled chintz with all the accents were my deal.  I had a Ralph Lauren “Alison” comforter on our king sized bed in the master bedroom.  Hubby used to smile at his friends and declare, “I’m very comfortable with my masculinity”.  Bless his heart.  Anyway, the pink wasn’t nearly as “pink” as it appeared to me upon removal of the wallpaper and like many things in those early years after about 10 years of pinkness I was over it.  There was a collective sigh of relief from hubby and sons #1 & 2!

In the above image I forgot to take the towel off the love seat…this is where the cat sleeps and the amount of cat hair that little towel keeps off the cushion is amazing!  On the right is the sofa sans towel.

This is probably the first DIY project that was this involved I’ve taken on since I’ve been working full time.  It was rewarding but I confess it took a village…thank you doesn’t begin to cover the appreciation I must extend to my dear friend Gretchen!  She spent an entire day helping me paint and then returned the following day to help me paint the crown molding.  Gretchen, XOX to you and my offer to help you garden stands!

There you have it…my “before” and “after” Part I.  When I reupholster the window seat, sofa and possibly the ladder back chair I’ll post pictures.  Any thoughts, suggestions?

One quick note about the Jerk Chicken—I prepared it and it really was easy and delicious.  I made a couple of changes and thought I’d pass them along:  I substituted jalapeno chiles (fresh) for the habanero chile the recipe calls for. {only because my market didn’t have fresh habanero chiles}…and I used boneless skinless chicken breasts.  They were easy and because they marinate overnight, they were very flavorful.  It’s a keeper recipe, in my book.

The Secret Garden

Tags

Aside from the fact that I loved the book “The Secret Garden” by Frances Hodgson Burnett, I always loved the idea of having a space in my yard that would be unexpected, a bit self-contained and hopefully pique curiosity.

Peter comes out in the spring.  This is my side yard garden.

Having a small yard, for years I didn’t believe it was possible to realize my dream in this house.  But after a home tour of a Balboa Peninsula home (where yards can be the size of postage stamps) and the homeowner had a lovely knot garden, I was inspired to try my hand at creating my dream, or a slightly modified version of my dream.

This is my friend, Carla’s beautiful secret garden.  She has walls on 3 sides so her garden is truly more “secret” than mine.

When I embarked on this project I had my own landscape business, Blooming Borders, in partnership with my dear friend, Wendy.  I knew I could get the plants wholesale and figured I could do most of the planting.  Importing and installing the gravel as well as the  1” x 2” border boards was another story so I employed the help of a team from another self-employed landscaper who generously allowed his guys to do the backbreaking work of grass and root removal, installing the borders and gravel (all for a very affordable amount of $$$).

This image was taken last spring…Sally Holmes (climbing rose) is on the fence between my neighbors yard and since it blooms only once a year I’m considering moving it to a different spot in the yard and installing an espaliered tree of some kind.  What do you think?

I completed this garden 10 years ago and I still enjoy this space in my yard, even if it isn’t truly “secret”. (There’s no hidden entrance and you clearly see all parts of the garden from the back yard, but it is unexpected and I’ve thoroughly enjoyed it as a “room” in the backyard.

This is Pearl (a hybrid tea rose) and it’s never really done well, although this picture was taken at it’s best.  I may put Mr. Lincoln in its place.

It is now in need of some renovating, that word is beginning to sound like a broken record around my house! I want to plant a line of hydrangea, replace a couple of the roses and work on removing the ever-invasive roots from my neighbor’s tree.

Here is the look I’m going for and a list of the work ahead of me…

I have a hybrid tea rose in each of the center planting areas of the knot.  One of the roses isn’t very happy and I’m thinking of replacing it with Mr. Lincoln.  Isn’t it a beautiful red.

This is an espaliered fruit tree, wouldn’t that be nice…visit the secret garden and pick an apple!

The  main thing I will need to do in my “secret” garden will be to being to replace the border boards that have, after 10 years, finally started to break free of their restraint posts.  I am thinking of trying my hand at placing a line of used brick in its place. 

I realize this image is of some other kind of brick but you get the jest.  I would make the border a single brick width.  I will keep you posted on how this goes.

This is the formal knot garden from a wonderful blog site called Brabourne Farm

This little plaque was a gift when my grandmother passed away so many years ago and it resides in the secret garden.

Newton’s Winery, their knot garden is spectacular.  We visited in 2008 with our dear friends Julie and Dave and it was a bit on the blustery side but still so beautiful.  Truly inspirational for me.

So wish me luck.  I’ve got some serious work to do, but maybe by this time next year I will have the row of hydrangeas and some of the other plants performing their best.


Great spring recipe :: Grilled Jerk Chicken

Tags

Now that the promise of spring weather is at hand I have been thinking of dining al fresco {which may be a bit premature} but these images from The Inside Story made me anxious to begin planning.

Image via The Inside Story~via pinterest


Image via The Inside Story~via tumblr

Image via Nine & Sixteen

This is the first spring I can remember when I am eager to have warm (not HOT) days and cool evenings.  I am a cool weather person by nature but this past winter has been very cool by Southern California standards and I guess I’m ready for some fun in the sun {slight exaggeration since I’m a fair skinned red-head and try to avoid direct sun exposure}.

With that in mind I figured I better get some grilling recipes ready and what better time to ask hubby to be the guinea pig on some new meals?!

Okay, I know this isn’t a guinea pig but I couldn’t resist the cute little guy with his petunia hat!  Image via Content in a Cottage

I visited one of my favorite food sites, Epicurious, and came up with this recipe (one of their top rated/reviewed chicken dishes.  I’ll let you know how it turns out.

Image by Ericka McConnell via Epicurious

Grilled Jerk Chicken

INGREDIENTS:

For jerk marinade:

  • 3 scallions, chopped
  • 4 large garlic cloves, chopped
  • 1 small onion, chopped
  • 4 to 5 fresh Scotch bonnet or habanera chiles, stemmed and seeded
  • 1/4 cup fresh lime juice
  • 2 tablespoons soy sauce
  • 3 tablespoons olive oil
  • 1 1/2 tablespoons salt
  • 1 tablespoon packed brown sugar
  • 1 tablespoon fresh thyme leaves
  • 2 teaspoons ground allspice
  • 2 teaspoons black pepper
  • 3/4 teaspoon freshly grated nutmeg
  • 1/2 teaspoon cinnamon

For chicken:

  • 4 chicken breast halves with skin and bones (3 pounds), halved crosswise
  • 2 1/2 to 3 pounds chicken thighs and drumsticks

INSTRUCTIONS:

Make marinade:
Blend all marinade ingredients in a blender until smooth.

Marinate and grill chicken:
Divide chicken pieces and marinade between 2 sealable plastic bags. Seal bags, pressing out excess air, then turn bags over several times to distribute marinade. Put bags of chicken in a shallow pan and marinate, chilled, turning once or twice, 1 day.

Let chicken stand at room temperature 1 hour before cooking.

To cook chicken using a charcoal grill:
Open vents on bottom of grill and on lid. Light a large chimney of charcoal briquettes (about 100) and pour them evenly over 1 side of bottom rack (you will have a double or triple layer of charcoal).

When charcoal turns grayish white and you can hold your hand 5 inches above rack for 3 to 4 seconds, sear chicken in batches on lightly oiled rack over coals until well browned on all sides, about 3 minutes per batch. Move chicken as seared to side of grill with no coals underneath, then cook, covered with lid, until cooked through, 25 to 30 minutes more.

To cook chicken using a gas grill:
Preheat burners on high, then adjust heat to moderate. Cook chicken until well browned on all sides, 15 to 20 minutes. Adjust heat to low and cook chicken, covered with lid, until cooked through, about 25 minutes more.

Serve chicken with pineapple/papaya salsa.

Cooks’ note: · If you can’t grill, you can roast chicken in 2 large shallow (1-inch-deep) baking pans in upper and lower thirds of a 400°F oven, switching position of pans halfway through roasting, 40 to 45 minutes total. {This is the dreary/rainy day alternative}


What’s in a name?

Tags


Naming a house seems to be the norm in England and maybe on the east coast of the U.S. but you don’t hear of too many homes in Southern California having been given names…unless they are grand manor houses.

Like this lovely little abode in Santa Barbara…

~or~


The above entry is from an amazing French-inspired home designed by Architect Steve Giannetti.  See more of this beauty at Velvet & Linen HEREI don’t see a name sign but I hope the owners have named it.
~~~
In Atlanta, where incredible homes reign, I wonder if they name them?

This beauty was posted on Limestone & Boxwoods blog site.

…and Things that Inspire always  posts beautiful images of the Atlanta Homes she finds inspiring.

~~~

We live on Bethany Drive and for some reason, from the moment I knew this house would become our home, I wanted to name it.  It was probably 8 years after we moved in that I purchased an antique-brass name plate that declared our humble abode as “Bethany House”.  The plaque also has the words “Est. 1982” which was the year we moved in.

It may seem silly but I always  smile when I see the plaque and am reminded of how happy we’ve been in this home.

I didn’t know of this (above) sign company until about a year ago when The Lettered Cottage hosted a giveaway of a Ramsign.  Ramsign has an amazing selection of classic address plaques.

5th & State, one of my favorite blogs, recently posted a series of pictures from charming door/entry ways in England, all with names attached.

Do you wonder if the person that lives here is named Elizabeth?

As a huge Christmas fan I think the name “Mistletoe Cottage” is inspired!

I’ve read that in some countries they name their house based on the street that the home is located on and that Realtors have been known to suggest that the homeowner change the name to create more appeal if the house is up for sale.

My little name plaque…

Have you named your home?  Does it have a name-tag?

Spring has arrived…per the calendar

Tags

Since spring is sure to arrive any minute now…it’s officially on the calendar but isn’t in full swing.  Mother Nature has toyed with us and there’s been a couple of spring-like days but I’m still waiting for the real deal.

So while I wait I thought I’d dream of what I want my garden to look like.

No, I don’t have a thatched roof cottage but I wish I did!

Somehow the Brits just know how to grow flowers without them looking too contrived, almost as though they grow wild.

Braeburn House, via Options 1st

In case you imagine this entire post is a fantasy, I do have a white garden gate to the back yard…now I just need to tame the wildness that has occurred over the winter months.

Okay, this garden is being shown because wouldn’t we all love a tennis court in our back yard, especially a grass court!

Herb garden, Belmont House

I am going to work on my herb garden this spring.  I want more herbs than I’ve had in the past, maybe even a pepper or two.

This image is not part of the Options 1st set, Flickr

If my yard had more sun I’d definitely be down for a few raised vegetable beds.

It seems that in England flowers even grow in baskets on bicycles!

The above images are via a website I discovered thanks to Rosemary at Content in a Cottage called Options 1st…enter at your own risk!

Ugardeners FlickrVia UGardeners, Flickr

I will work on my roses so that they bloom like these (above) and try my best to get rid of the sawfly that has plagued them every summer for the past 5 years!

And finally, I will tend to my sheep…oh wait, I don’t have any sheep.  Sheep and chickens, I’d like them both but might have to move to be allowed any!

Happy Spring and hopefully, we’ll all feel the warmth of the season soon!


Paint color…too many choices!

Tags

I’m in the process of renovating our library (or sitting room, or very small living room, whatever I call it on any given day).

The room was wallpapered with a Ralph Lauren paper made to look like aged plaster (not a really good imitation, but fairly neutral and I liked it for quite a few years).

The print between the plates (above) is the print that now hangs in the dining room…as you might imagine, quite a large patch of original colored wallpaper in a sea of faded paper, not a good look!

About a month ago I decided I wanted to move a framed print from the library into the dining room.  I had a little vignette all figured out for the space and was pretty excited for the change.  {I do love change!}  I moved the print and was amazed at how faded the wallpaper had become.

I confess, I love the new look Restoration Hardware (images above and below) has been promoting and the gray they use became an inspiration for upcoming (and much needed) upholstery fabric for the sofa, window seat cushion, and ladder back chair and ottoman.

Since the library was wallpapered about 8 years ago I thought it was a good time to take down the paper and paint (more on the renovation in a future post).

Image via Elle Decor

I knew I didn’t want the paint to be too sunny since the room has so much natural light, sunglasses indoors isn’t a good look for me!

Image via John Jacob Interiors

…I know this is a bathroom, but the color on the walls reminded me of Restoration Hardware paint and I really liked it.  So I bought a smallish can of Restoration Hardware’s Graphite (it was similar in appearance to the above wall color.

Image via Atmosphere blog

Additional inspiration…

Image via Atmosphere blog

I have a gray-ish basket trunk from IKEA that I use for a coffee table so this image was additional ammo for the whole gray paint idea.

Many of you probably figure that finding paint is easy, right?  Well, I have seen more paint chips over the past 2 ½ months than I care to mention and ultimately, I have decided to paint the room the same color the dining room is painted, “Inside Passage” by Dunn Edwards.

Image via Country Living

I didn’t think white paint (as in the image above) would be a good fit for the “look” I ultimately wanted to achieve, however, I love this room by Kolene Spicher.

Meanwhile, I looked at Pottery Barn paint chips (Benjamin Moore paint), Restoration Hardware paint chips, Behr from Home Depot, Martha Stewart paint chips, also at Home Depot, and my head was aching by the end.

There are a lot of paint tools online and House Beautiful has one that works well, but there is nothing like painting a good sized patch on the actual wall and standing back to determine its merit.  I ultimately called by good friend and designer, Gretchen, to weigh in on the sample.  She saw green in the Restoration Hardware gray sample.  Knowing her eye is better trained than mine I went back to the Inside Passage by Dunn Edwards.

Image via Jackye Lanham – website

The wall color in the image above is what “Inside Passage” looks like.  It has a bit of gray and taupe in it.  I like it because it changes looks with various light.

Have you had to select wall color recently?  Was it as challenging for you as it was for me?